Whether you want to buy a WordPress theme or use a free WordPress theme is up to you. But the odds are good if you’re willing to invest just a modest amount into a theme, you’ll see much better results. In this guide you’ll learn where to find WordPress Themes, how to load them onto your site, and how to install a theme on WordPress and configure it.
Preparing Your Site For a WordPress Theme
There are a few basic things you’ll need in place before you can install a theme on WordPress.
A website hosted on a web host serverA current WordPress platform installed on your websiteYour registered domain pointing to the correct website
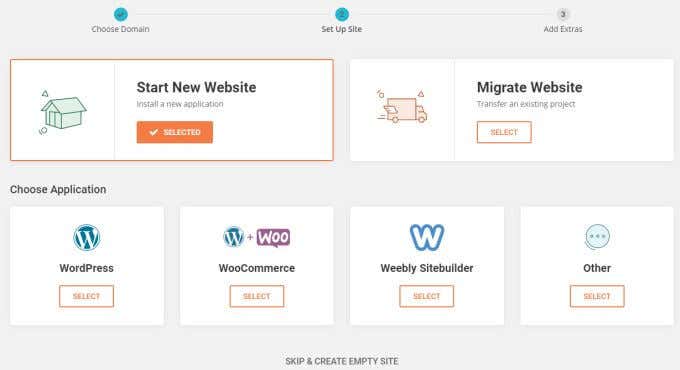
If you have a basic web hosting account, you may very well have to go through the manual steps above to install your own WordPress platform. However many web hosts provide the WordPress installation for your website with just the click of a button. If you’re using WordPress.org instead of your own web hosting account, then you don’t have to worry about setup. WordPress is already installed and ready to install new themes! Once you have everything ready and you’re logged into the WordPress admin panel, you’re ready to install a theme on WordPress.
Finding Your WordPress Theme
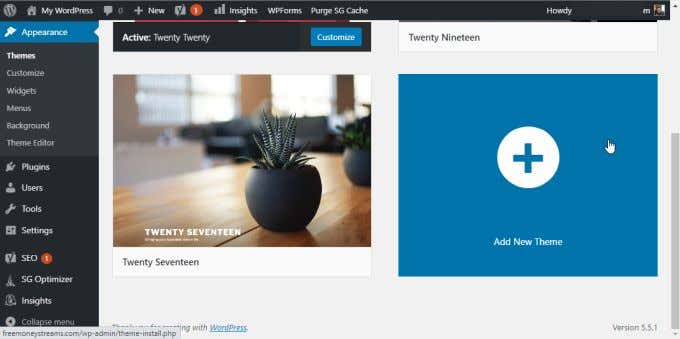
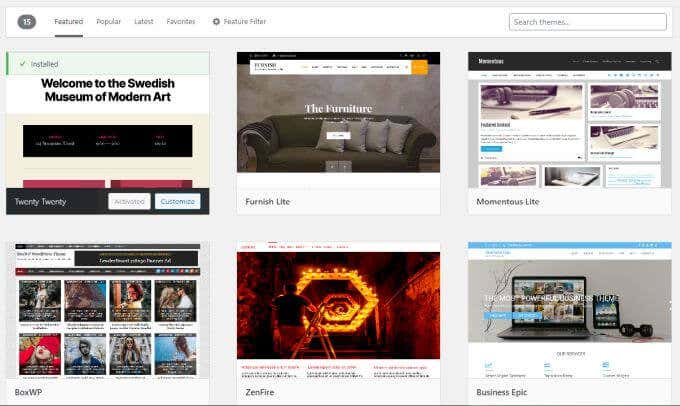
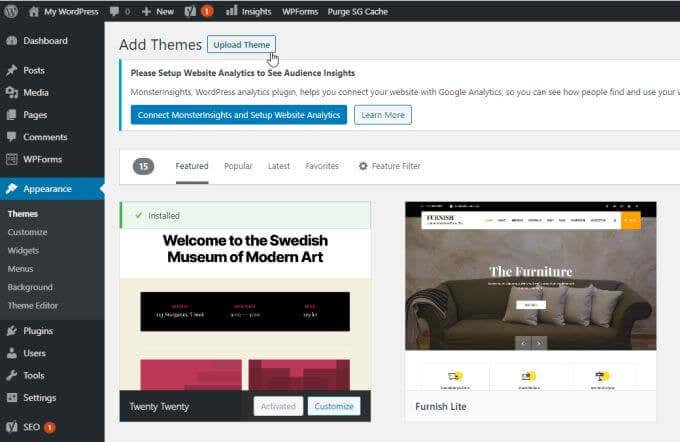
You may not know this, but you can actually instantly install a number of free WordPress themes that come with the WordPress basic installation. To see these, just select Appearance from the left navigation panel and select Themes. In this window you can browse a number of already installed themes that come with WordPress. To switch to any of those, just hover the mouse over that theme and select Activate. If none of these look good to you, you can select the Add New Theme block at the bottom of the list. This will take you to a window where you can browse through lots of other free WordPress themes you can upload to and use on your WordPress site. If none of these look good and you want to install your own theme, you’ll need to find one online. There are numerous websites that offer premium WordPress themes that you can purchase. A few of the most popular ones include:
WordPress.org (free themes)Theme Forest (Envato Market)Template Monster
There are also countless individual theme designer websites where you’ll find a whole collection of WordPress themes created by one design team. Once you’ve found and purchased your theme, you can download it. You usually download theme files as a ZIP file to your local PC. Once you have that file, you’re ready to start your WordPress theme installation.
How To Install a WordPress Theme
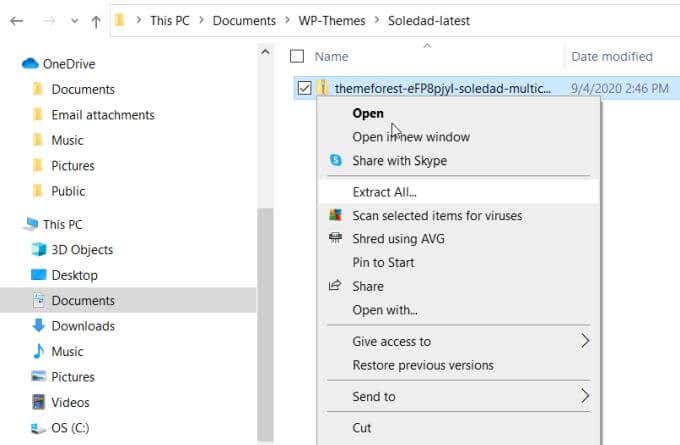
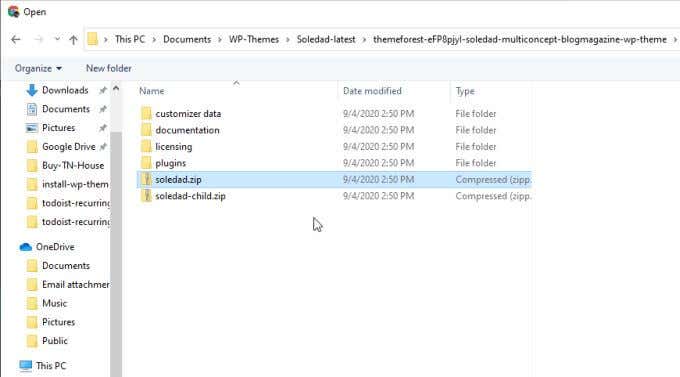
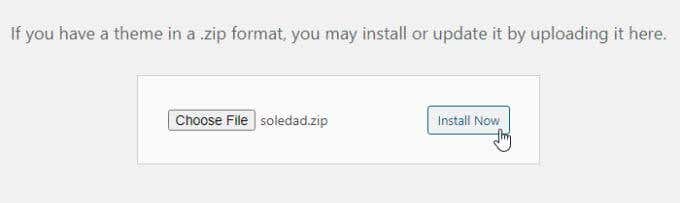
Before you can install the theme, you’ll need to prepare the files. Using Windows Explorer, navigate to the file you purchased and downloaded to your PC. Right click on the ZIP file you downloaded, and select Extract All. This will extract all of the contained WordPress theme files to another folder (wherever you extract the files to). These extracted files will contain a lot of additional folders and files. One of those files will be a .zip file with the name of the theme in front of it. This is the file you’ll need to open from WordPress to install the theme. Back in the WordPress admin page, select Appearance and select Themes. At the top of the themes window, select Add New. Back in your WordPress admin panel, select Appearance, and select Themes. Select Add New Theme. At the top of the Themes window (where you were able to browse through available free themes), select Upload Theme. This will open a new box where you can select Choose File. This will open a file browser window where you can navigate to where you downloaded and saved the ZIP file of the theme you purchased. Navigate to the extracted files and choose the ZIP file with the theme name. Select the file and then select the Open button at the bottom of the window. This will take you back to the previous window in the WordPress admin panel. Select Install Now to install the theme. In this window you’ll see the progress of the theme files getting unpacked and installed. Once the process is completed, you’ll see a status update saying so.
Activate Your WordPress Theme
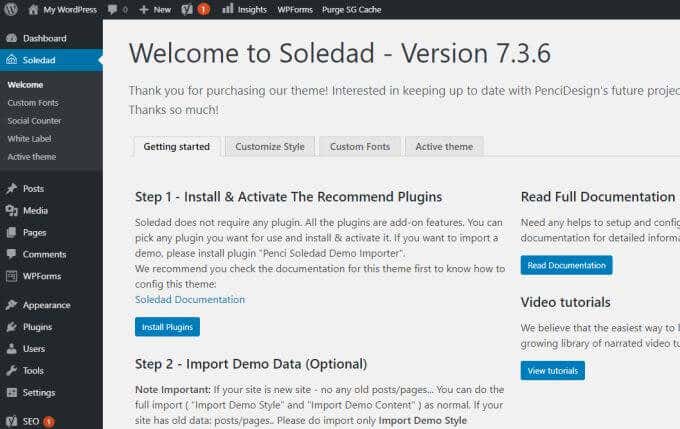
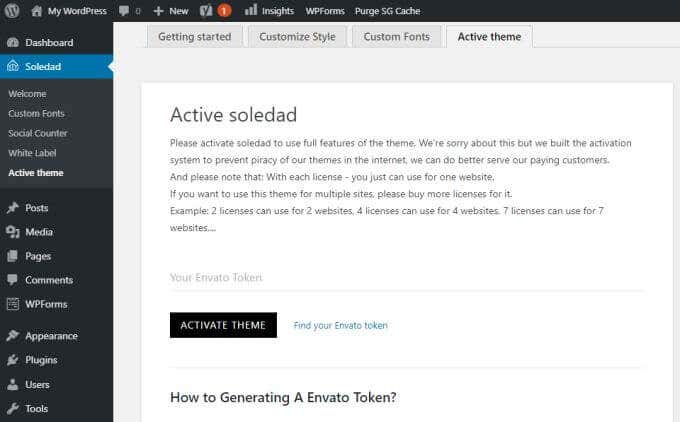
Once you’ve installed your theme on WordPress, when you return to the Themes window you’ll see it listed as a new available theme block. Hover over this block and select the Activate button. Your new theme is now installed and activated! Most premium themes, if you’ve purchased one, usually come with settings, documentation, and sometimes even how-to videos showing you how to configure and use the theme. When you select on the Dashboard in the admin panel, you may see some of this on the theme tab (if there is one that came with your theme). Even if you’ve activated the theme, you may need to activate the theme inside the theme settings itself. This isn’t the case with all themes, but with some you’ll need to navigate the settings for an Activate button and select it. When you first install a theme, you would expect that your site will magically look just like the demo did. Unfortunately, this is rarely the case. Usually, you’ll need to configure a few things to all of the components of the theme that made the demos look so good in the first place.
How To Configure Your WordPress Theme
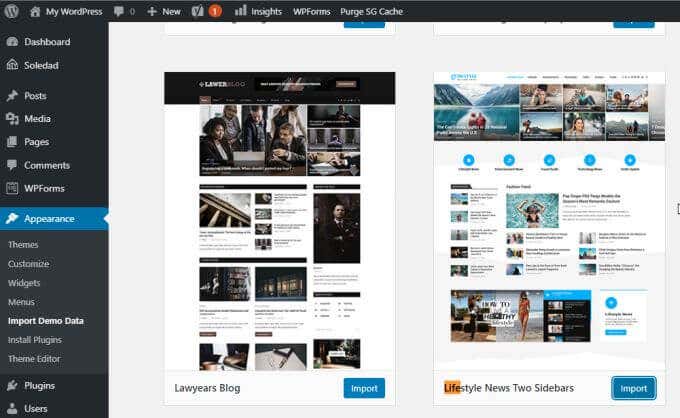
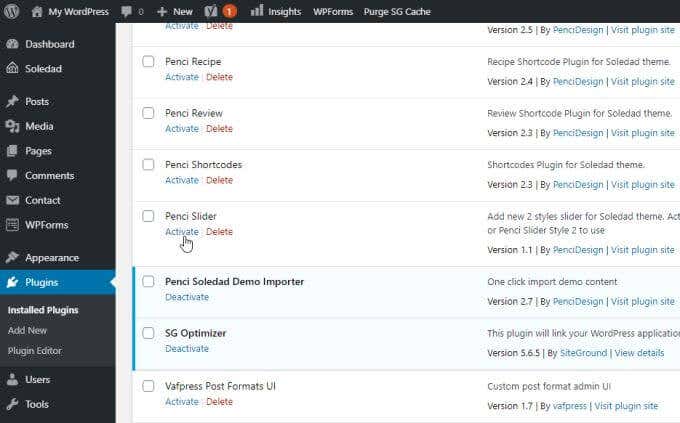
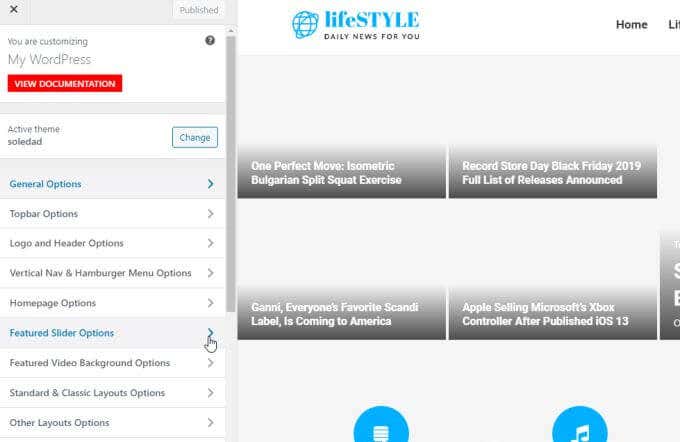
Luckily, you don’t need to know coding or anything too complicated to get your theme working right. In fact, many themes come with files you can upload that’ll make the site look just like the demo, with all of the formatting and even much of the demo content. You can do this by selecting Appearance and looking for anything that says Import Demo. You will be able to select which demo you liked and select the Import button to import all of the files and configuration settings that made the demo look right. After you’ve done this, when you preview your site it will change but it still may not look quite right. This is because most themes require active plugins. When plugins are imported after you install a theme, they’re usually imported inactive. Fix this by selecting Plugins in the left navigation menu in the WordPress Admin panel. Select Installed Plugins from the submenu. In this window, you’ll want to go down each of the plugins and select Activate underneath it. When you’re finished, take another look at your site preview. You’ll see that the site is now formatted just like the demo you viewed. All you need to do is start replacing the demo content with content of your own! You can also customize the theme further by selecting Appearance from the left menu, and selecting Customize from the submenu. This will open a theme customization window, with all of the available setting configurations that were programmed into it by the theme developers. This is where you can customize things like the site logo, header and text formatting, homepage layout, and much more. Usually demo imports will tweak all of these settings for you so that the site looks like the selected demo. If you haven’t imported a demo setup, then this is where you can manually configure the theme appearance and layout yourself. Installing a WordPress theme doesn’t require any programming or advanced WordPress knowledge. All it requires is uploading and activating the theme and then taking the time to learn how to customize that theme to your liking.